Donna's Small Desk Calendar
Small Calendar
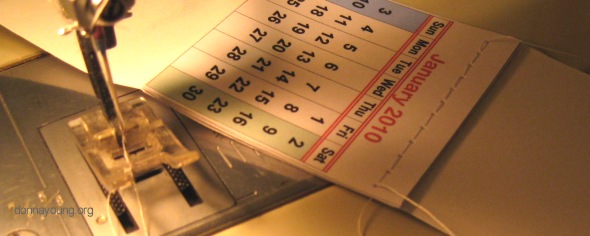
Instead of sewing, the calendar can be stapled. Or the top can be glued similar to a glued pad. Stapling is the easiest, sewing is easy if you have access to a sewing machine.
Thread Choice
I used regular sewing thread. It might have been better to have used a heavier or stronger thread. I will use this calendar for a year, tearing off the months as they pass. If I remember, I will report back on the condition of the thread. -- Reporting back: As the year passed, the threads became loose because pages were removed from the calendar. The thread held up though. I was careful each time I removed a page.
If sewing the calendar, use your sewing machine and a heavy duty needle. Set the machine to a long stitch, I used 6 per inch. Place the months under the presser foot, drop of presser foot and help the machine make the first hole. Use the wheel. Sew the hole slowly, helping the machine if it needs it by using the wheel. Do not attempt to push the months through because doing so can cause the needle to become misaligned from the hole and shatter or bend the needle once it hits the plate instead going into the hole. Sew across the top of the months and end before sewing off.

Pull the threads to the back of the months and tie them with a square knot. Cut the loose ends to around an inch long and place a piece of tape over them at the back of the calendar to secure the threads.
After attaching the months to the card stock, fold the card stock at the top and the bottom of the months to start forming the stand. See Small Desk Calendar - Folding the Stand


 Exploring Color Theory
 MM Medium - Handwriting lessons


