Suggested Schedules and Planner
Choose a schedule based on the number of letters that will be taught each week.
Links to Schedules on this Page
- One Letter Each Week
- Two Different Letters Each Week
- Three to Four Different Letters Each Week
- Introduce Letters by Shape or Stroke
Handwriting Lesson Planner

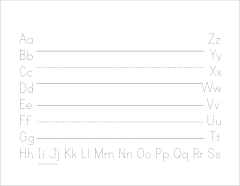
The optional 4-Page![]() Handwriting Planner | Matching Ruled Paper
Handwriting Planner | Matching Ruled Paper
This planner features:
- Table of letters to keep track of how often a letter is part of the lesson
- Six 6-week planning tables for 36 weeks of plans
- A ruled background for comments and goals
- An illustration of letters sorted by shape and stroke
Schedule 1 - One Letter Each Week
Monday - Thursday
General Instructions for each day:
- Print 2 sheets of the same file.
- Cut each one in half dividing the upper case from the lower case.
- Teach and then assign one of the half-sheets.
Friday
- Review last week's letter(s) using a printable, Blank Ruled Paper, or the white board/chalk board.
- Teach and practice a number.
- Decorate a hollow letter choosing "this week's letter"
- Have no penmanship lesson today.
Schedule 2 - Two Different Letters Each Week
Monday - Thursday
General Instructions for each day:
- Print 1 worksheet for each of the 2 different letters that you are teaching this week.
- Cut each one in half dividing the upper case from the lower case.
- Teach and then assign one of the half-sheets.
Friday
Choose One Activity
- Review last week's letter(s) using a printable, Blank Ruled Paper, or the white board/chalk board.
- Teach and practice a number.
- Have no penmanship lesson today.
Schedule 3 - Three to Four Letters a Week
Monday - Thursday
General Instructions for each day:
- Choose which letters to teach and print a worksheet for each letter. If you want to concentrate on one shape, see chart below.
- Teach and then assign one of the worksheets.
Friday
- Review last week's letter(s) using a printable, Blank Ruled Paper, or the white board/chalk board.
- Teach and practice a number.
- Since this is a fast moving class, use a printable from K-1 Colors.
- Have no penmanship lesson today.
If you want to Introduce Letters By Shape and Stroke
There are a few shapes that letters have in common as well as stroke direction. If you want to introduce the letters in an order based on shape and stroke see the chart below.
 c, o, a, d, g, q, f, e, s, C, O, Q, G, S
 r, n, m, h, b, p, P, B, R, D
 *t, u, U,
*t can be taught with a hook or without a hook.
 l, *t, i, j, y, v, w, x, k, z, E, F, I, H, L, T, N, M, A, K, X, Y, Z, J, V,
Blank Ruled Paper
Blank Ruled Paper - coordinates with Set One.
The next two files coordinate with Sets 2 and 3.
Teaching Suggestion
(Repeated at Large Letters)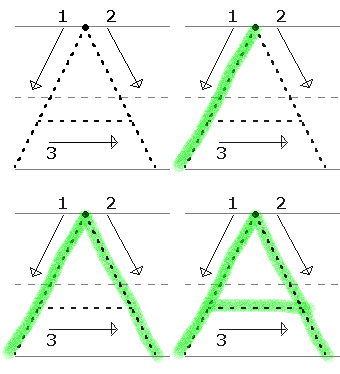 To conduct the lesson, first draw the letter that you are going to teach on a white board or on paper. Demonstrate which direction to make the strokes. If your child enjoys writing on the white board, allow him to practice the letter a few times. After this introduction and if there is still time, hand your child a practice sheet. Your child can use markers, crayons, or a pencil to trace the letters. If you have a theme color, use a crayon or marker in that color or you could let your child choose which color to use.
Observe your child tracing the characters! This is THE time to teach character formation. If you hand the printable to your child and then walk away, you are giving opportunity to error. Stand by and watch your child draw the first and second character (at least).
You can opt to teach both capital and lower case on the same day or you can teach them on different days. Either way, try to keep the session between 7-15 minutes. Practice 4-5 days a week.
Links to The Handwriting Lesson Sets
Donna Young

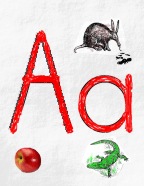

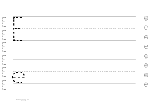

 The 1/2 rule height version of this set "DN" is finished.
 Please improve my Drawing with Shading
 MM Medium - Handwriting lessons
