Learning the Basics - Lessons
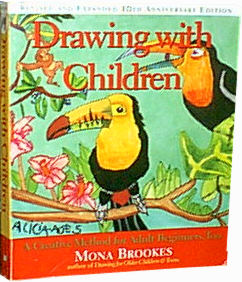
How does one compile Lesson One into lesson plans? That is where this book "got me" when I wanted to make lesson plans for my own children long ago, and naturally share the lesson plans with others, so let's give it a try.
First, let us consider the objectives of Lesson One - Learning the Basics. The objectives are important to keep in mind because that is what you will be teaching. From the objectives you will be able to develop the main evaluation points [the 3criteria]. While reading through Lesson One and thinking about what is taught we can sort out the objectives, which seem to be what I have listed below. The items in the list are what we will keep in mind when we are working on the lessons.
-
The student learns at his level about the elements of shape -
- how to see the elements in an object,
- how to observe and draw the elements of shape,
- and finally, how to draw the elements in such a way that a recognizable object is drawn.
Lessons Below-
Under "Donna's Breakdown of Lesson One" I have listed lessons that you can insert into lesson planner slots. Think of the lessons as modular parts of this chapter. Repeat the lessons as often as you need to meet your objectives. For instance, lesson B covers the elements of contour shape. If you notice that your child has not mastered lesson B and you want him to master it, you can opt to repeat lesson B by placing "B" in planner slots as often as you need to go over the material.
Please Note: I have added review of Lesson B to Lesson C and a casual test of lesson B to lesson D. This sort of review and testing is not in the book. You, as teacher, should observe when review is needed and add it accordingly. This brings us back to the objectives of the class
Be sure to read the pages listed ahead of time so that you will know what you are getting into.
Donna's Breakdown of Lesson One
Each lesson, labeled with a letter [a,b,c,...k], is potentially- a class. Listed at the end of this article are two sample lesson plans that use the letters [a,b,c,...k] to refer to the lessons.
A. Introduction to Your Supplies - page 58-59
What child would not benefit from realizing that methods and techniques can improve his drawings?
Get
the supplies and with your book opened at page 58-59, go over the suggestions with your child while he tries them.
B. Introduction to the Elements of Contour Shape
(And this assumes that you have read all of the pages suggested under Read First.)
Have ready:
-
A copy of The Five Basic Elements of Shape from Page 60.
- The children's art supplies (markers and drawing notebook or paper) .
You are going to teach your children the elements of shape by telling them about each one and showing them the element of shape by drawing one on the white board and letting them draw various examples of each element in their art notebook.
C. (Skipping the visual game for now) Random Warm-up - page 65-66
Have ready: markers and drawing notebook or paper and your element of shape chart.
Bring out your copy of The Five Basic Elements of Shape and briefly go over each one. After that, have your children to do the Random Warm-up described on pages 65-66. The random warm-up looks kind of fun if you ask me and no one did.
D. Duplication Warm-up - page 66
(Can choose from drawing 1a files1 at older, younger or make copies of pages 44-45)
Have ready the markers, the duplication warm-up papers, and your elements chart.
This time cover the names of the elements with your hand or a piece of paper and see if the children can tell you the names of the elements of shape: dot, circle, straight line, curved line, and angle line. If not, help them out. After that, bring out the duplication warm-ups.
E. Matching Warm-up - page 66-67
You will need to make a set of the matching warm-ups for each child. Have your elements of contour shape chart ready and as usual, go over with the children. Then do your matching warm-up worksheets. If this lesson is too short, repeat a duplication warm-up since it has the same "observation" theme.
F. Mirror Image Warm-up - page 67
(You may choose from the mirror image files1 at drawing 1a or make copies of pages 69)
Skip going over the shapes today unless you think your children need the reminder.
Go over today's lesson with your children. If you think it will help them, show them how to do the mirror image drawing on your white board, and then start the work.
G. Abstract Design Warm-up - pages 68-75
If your children have forgotten the elements of contour shape, then go over them before starting this lesson. Your children will be following your verbal directions in this lesson, which is a nice bonus skill. Have them get their supplies (or you get them) and have them listen to you while you give directions telling them how to draw the abstract design warm-up. The directions are given in the book in a list. The child should listen, then draw, then you read the next direction on the list - they listen, then draw -and so on.
An Additional Abstract Design Warm-up
- Turn your paper in any direction.
- With broad marker, draw one large circle.
- With broad marker, draw one straight line through the large circle.
- With narrow marker, draw 3 curved lines inside the circle to one side of the line.
- With broad marker, draw 5 dots inside the circle on the other side of the line.
- With a broad marker, draw 4 angle lines on the outside of the circle, yet touching the circle.

See how easy it is to make up a warm-up? You didn't see me make this additional Abstract Design Warm-up, but if you had been here, sitting next to me, you would have seen that it took just a minute to do. If your children are benefiting from the Abstract Design Warm-up, then make some and repeat the lessons as much as you need to fulfill your objectives.
H. Abstract Design Collage - described on page 74
See page 74 and look at figure 1.10. You might need to make up a list of elements to draw on the pieces unless you want to give the student free reign in this particular lesson.
Wild and Crazy
Regarding the Abstract Design Warm-up, the author encourages you to be creative, to "use your imagination to invent something different" 2. I can see you now dragging out the yarn scraps, macaroni, and odd buttons for your kids to glue on their papers.
Before Starting Wow! I Can Draw!
I. Visual Games
Before the next section, let's back up to the visual games that are on page 64-65. If you have been doing the games all along, skip this or do them again. What we want to do is to make certain that the student can locate the elements of contour shape in real items. If you need ideas, you can find them in the book under the descriptions of the five elements on pages 62-64.
J. Wow! I can Draw!, Part 1, pages 75-76
Read the introduction on page 75 so you can explain this exercise to your student.
You will need a copy of the handout on page 76 and fine point markers. If you would rather not make one, then print any of my blank grid files. There is one pictured to the right, it is a 4 x 5 grid. If you prefer a 4 x 4 grid, there is one on this web page: Grids
K. Wow! I can Draw!, Part 2, pages 75-79
Read the instructions and the step by step. This one starts near the bottom of page 75 and goes through page 79. Have the drawing supplies ready and do this lesson.
The lesson might take more than one day - in the sample plans below, it is listed two days in a row as if it will take two days.
This is the last lesson of Lesson One. How did everyone do? Did we meet our objectives? If not, should we repeat any of the lessons?
Two Sample Plans - Plans are Keyed to Topics in Paragraphs Above
Art every other day, some exercises repeated.
18 lessons - 7 weeks
| A | B | C | ||
| D | E+D | |||
| C | F | D | ||
| G | G | |||
| H | G | G | ||
| I | I | |||
| J | K | K |
Art twice a week, some exercises repeated.
18 lessons - 9 weeks
| A | B |
| C | D |
| C | E & D |
| F | D |
| G | G |
| G | G |
| H | I |
| I | J |
| K | K |
Topic List
A. Introduction to Your Supplies - page 58-59
B. Introduction to the Elements of Contour Shape
C. Random Warm-up - page 65-66
D. Duplication Warm-up - page 66
E. Matching Warm-up - page 66-67
F. Mirror Image Warm-up - page 67
G. Abstract Design Warm-up - pages 68-75
H. Abstract Design Collage - described on page 74
I. Visual Games - on page 64-65
J. Wow! I can Draw!, Part 1, pages 75-76
K. Wow! I can Draw!, Part 2, pages 75-79
Printable Files
The files below are somewhat of a printable version of this web page, "Lessons for Lesson One". Choose a doc type, txt, or pdf.
This Page & Sample Lessons
 DOC | DOCX
  PDF
PDF  TXT
TXT
Conductive Relaxation
I didn't include conductive relaxation in the lesson plans. I imagine that the relaxation techniques are taught and used as needed during any of the lessons.
Read First
Before starting the lessons be sure that you have read all of lesson one in the book from the beginning to the end.
Donna Young, June 15, 2009, Updated August 19, 2011
Notes and References
Page numbers are based on the book published in 1996.
1A note about using my printable files in Drawing 1a for this class:- For your Drawing with Children class, you do not have to follow my guidelines for evaluating the duplication warm-up. My printable files at draw 1a are evaluated for a different objective (line shape and direction in a space).
2 I quoted Mona Brookes, last paragraph, page 74
3 Criteria (plural) are the rules and standards that will be used when evaluating a student's work. Criteria must have been covered in class in order to fairly issue a grade on it. We use criteria to systematically teach and then evaluate a student's work.


 Cube Templates
 Cell - in Life Science


