GeoSafari Cards
GeoSafari Users: This is a resource for the homeschool curriculum, Exploring Creation With Biology, published by Apologia Educational Ministries
You can use these print-outs to make cards for your GeoSafari unit. The first print-out sheet, the vocabulary sheet, is meant to be attached to a blank GeoSafari card (or used as the middle of the card). You can either purchase the blank cards or make them from large poster board. The instruction sheet tells the code to use and what words to write on the geo-card next to the lights. The words will be large enough so that if you want to glue the cards on the board, it will be possible. Sometimes, I will have to include a few "free answers" because I will not have enough question/answers for GeoSafari's built-in answer codes which need the 10, 12, 14, 16, 20, or 26 questions.
You may already be aware that I have a GeoSafari page with blank card print-outs. These print-outs will not work for everyone, but I encourage you to try. The print-outs are in both regular web page and acrobat. Print one sheet and place it in your unit after trimming it to see if the dots align with the lights on your unit. If the dots align, then you have a resource for blank GeoSafari cards. If you do not have any codes or basic instructions for your GeoSafari unit, you can find codes on the GeoSafari page.
Solid Middle Style: GeoSafari Resources for the first five modules of Exploring Creation With Biology
Module 1: Vocabulary Sheet | Instruction Sheet
Module 2: Bacterium Quiz long download-100kb | Instruction Sheet
Module 2: Vocabulary Sheet | Instruction Sheet *This sheet uses the top 11 lights, keep that in mind when you are cutting the sheet to fit in your GeoSafari unit.
Module 3: Vocabulary Sheet | Instruction Sheet
Module 4: Vocabulary Sheet | Instruction Sheet
Module 5: Vocabulary Sheet | Instruction Sheet
How to Make GeoSafari Cards with the Solid Middle Style
Instructions for making the cards if the words are spaced correctly on the instruction sheet:
1. Print the sheets on either regular paper or card stock. Card stock works better.
2. Place the center sheet under a regular GeoSafari card and mark the center sheet where it needs to be trimmed in height.
3. Place the instruction sheet in the GeoSafari unit to see if the words line up with the lights, if they are close enough to the correct light --- proceed with these instructions. If not click here for other instructions.
4. Determine where the bottom of the instruction sheet should be trimmed. This is best done by measuring the distance between the bottom light (*or the bottom-most light that will be used by the particular sheet that you are working with) to the bottom of the unit.
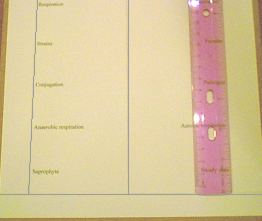 |
5. Use a ruler to mark the lines for cutting. Draw a line down the center of the sheet as well. |
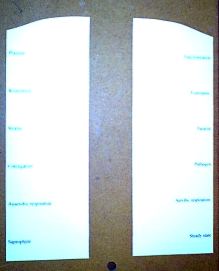 |
6. Trim the sheets. I cut the top at an angle because the top was not going to be just right. (please forgive my bad quality pictures) |
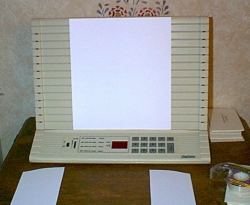 |
7. Place the Center sheet in the unit BACKWARDS |
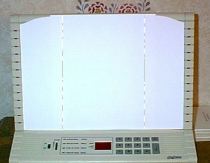 |
8. Place the "words" in the unit next, backwards. Allow them to overlap the center sheet. Tape the pieces in place with at least 4 pieces of tape. |
9. Remove the card from the unit and place the taped together card face down on a protected table. Fold the side flaps that have the words toward the center. You should be able to see the words when this is done right.
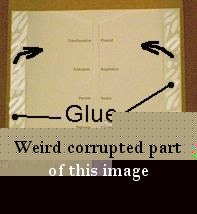 |
10. Put glue on the areas shown in the photo. The glue should be spread all the way to the edges of the paper. I prefer to use rubber cement for this. |
11. Fold the paper flaps that have the words back towards the front and press with your hands.
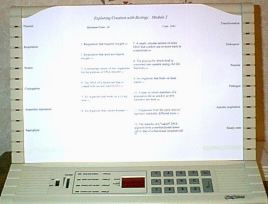 |
12. Turn your card over. Your new card is finished! |
Instructions for making the cards if the words are NOT spaced correctly on the instruction sheet:
Follow steps 1 and 2 above. At this point you have several choices---
You can:
- use store-bought blank GeoSafari cards.
- make GeoSafari cards from poster board.
- use the print-outs here to make GeoSafari cards.
In any case, you will most likely need a blank GeoSafari card-sized base to glue or tape your center sheet and words on.
Here is what I have done:
I used my printouts (linked above) for my GeoSafari card base. I used them because they work well with my printer. You can substitute with a store bought card or a poster board that has been cut to size.
I glued the center sheet on the middle of the homemade GeoSafari card. (I really like rubber cement because smears can be rolled off when it is dry and it usually does not crinkle. It is smelly though --- until it dries.)
I cut the words out in groups of 4. I was very careful to keep them in order.
I glued the groups of words on the GeoSafari card base at the appropriate places (next to the lights.) ;-)
At that point, the card was finished.
Here is a scanned close-up of the card:
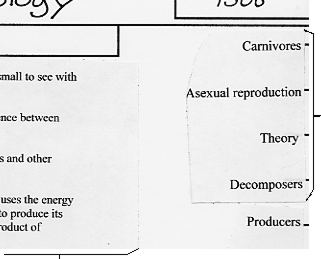 |
Here is an example of cutting the cards in groups of 4. In this image, you can see the section of paper that I glued to the GeoSafari card base. This section has 4 words on it. Notice how the bottom word, Decomposers is just a bit off the dot (where the light will be.) |
Just above in this image, you can see the edge of the center section that I glued to the middle of this homemade GeoSafari card base. You will also need to write the code number and the title on the card in the appropriate places.

 Printable Files and Quiz
 Cursive Words
